 Ultimate guide
Large Format Printing for Exhibitions: A Practical Guide
Quick Summary
Large format printing for exhibitions means producing graphics, banners and display panels from roughly A1 upwards, built to be readable from across a hall. Common products include stand backdrops, roller banners, pop-up displays and floor graphics. The aim is graphics that read well at a distance, look sharp up close and survive transport.
- Choose the product by use case: roller banners for portability, backdrops for brand impact.
- Pop-up fabric graphics need simple, high-contrast artwork because stretched fabric loses fine detail.
- Use matt finish under bright spotlights and gloss where colour impact matters most.
- Add 3-5mm bleed on rigid panels and banners, and 10-15mm on fabric graphics.
- Keep images at 100-150 DPI at final print size and key text at least 50mm from trim edges.
Table of Contents
- What Large Format Printing Covers for Exhibitions
- Choosing the Right Product: Banners, Stand Graphics, Posters and Displays
- Large Format Banners: Materials, Finishes and Durability
- Exhibition Stand Graphics: Planning Sizes and Layout
- Large Format Print Artwork Requirements and Prepress Checklist
- Planning Your Print Timeline, Delivery and Installation
- Sustainable Exhibition Printing: Materials, Reuse and Storage
- Accessible Exhibition Graphics and Measuring Print Performance
- Booking Your Exhibition Prints with Print Brain
- Frequently Asked Questions
What Large Format Printing Covers for Exhibitions
Large format printing for exhibitions means producing graphics, banners and display panels in sizes from roughly A1 upwards, printed on materials built to be seen from across a hall. For most exhibitors it covers stand backdrops, roller banners, pop-up displays, floor graphics and signage. Print Brain, based in Dorset and serving the entire UK, produces large-format displays alongside business cards and stationery. The aim of a good exhibition graphic is simple: be readable at a distance, look sharp up close and survive transport and repeated set-up.
Visitors at a busy show often give a stand only a few seconds of attention. Large graphics do the first job of catching the eye, and the smaller print on the stand does the second job of explaining what you offer. Getting both right depends on sizes, resolution and material choices made before the artwork is even finished.
Choosing the Right Product: Banners, Stand Graphics, Posters and Displays
Each product suits a different job, so start by deciding what the graphic needs to achieve on the day. A stand backdrop creates a large visual statement, while a roller banner gives you a portable, repeatable presence in a corner or at the entrance. Posters work well for information-led content, and floor graphics guide footfall.
Our pick by use case:
- Brand statement on a full stand: large printed backdrop or fabric graphics
- Portable, quick set-up: roller banners
- Information at eye level: posters or rigid boards
- Directing visitors: floor graphics and wayfinding signs
Think about how often the piece will be used. A display you will set up at ten events a year needs far more durability than one used once for a single trade show.
Roller banners and pop-up displays
Roller banners and pop-up displays are the most common choice for smaller exhibitors because they pack down into a carry bag and set up in minutes. They suit stands with limited floor space, multi-site events and presenters who travel. Their main limitation is size, since a roller banner covers a fixed, relatively narrow area, so plan your message to fit a vertical format.
Pop-up frames use a stretch fabric graphic that clips onto a frame. Keep the artwork simple and high-contrast, because the fabric is a larger surface and fine detail can be lost when it is stretched tight.
Indoor versus outdoor applications
Most exhibition graphics are used indoors, where you can choose lighter, non-weatherproof materials with excellent colour. Outdoor displays, such as festival or site-entrance banners, need weather-resistant materials, reinforced edges and secure fixings. Mixing the two is a common mistake: a material chosen for indoor colour will not cope with rain or wind, and an outdoor-grade material may look too heavy or matte for a close-up stand graphic.
If you are unsure, tell your printer exactly where the graphic will be displayed and for how long, so the material recommendation matches the environment.
Large Format Banners: Materials, Finishes and Durability
The material you choose affects how the banner looks, how long it lasts and how easy it is to transport. Thicker substrates feel more premium and resist creasing, but they add weight, which matters if you are carrying the display yourself.
Finish is equally important. A matt finish reduces glare under bright exhibition lighting, while a gloss finish makes colours appear richer but can reflect overhead lights. Choose matt for stands with strong spotlights and gloss where colour impact matters most.
Durability comes down to how the banner is handled. Fold it carefully, store it flat or rolled in its case, and avoid leaving it in direct sunlight between events. A well-cared-for banner can be reused across many shows, which makes the per-event cost much lower than a single-use graphic.
Exhibition Stand Graphics: Planning Sizes and Layout
Stand graphics work best when you plan the layout before choosing sizes. Measure the stand's wall space, the height of any fascia, and the sightlines from the aisle. Many exhibitors print artwork that looks balanced on screen but leaves awkward gaps or cuts off text once installed.
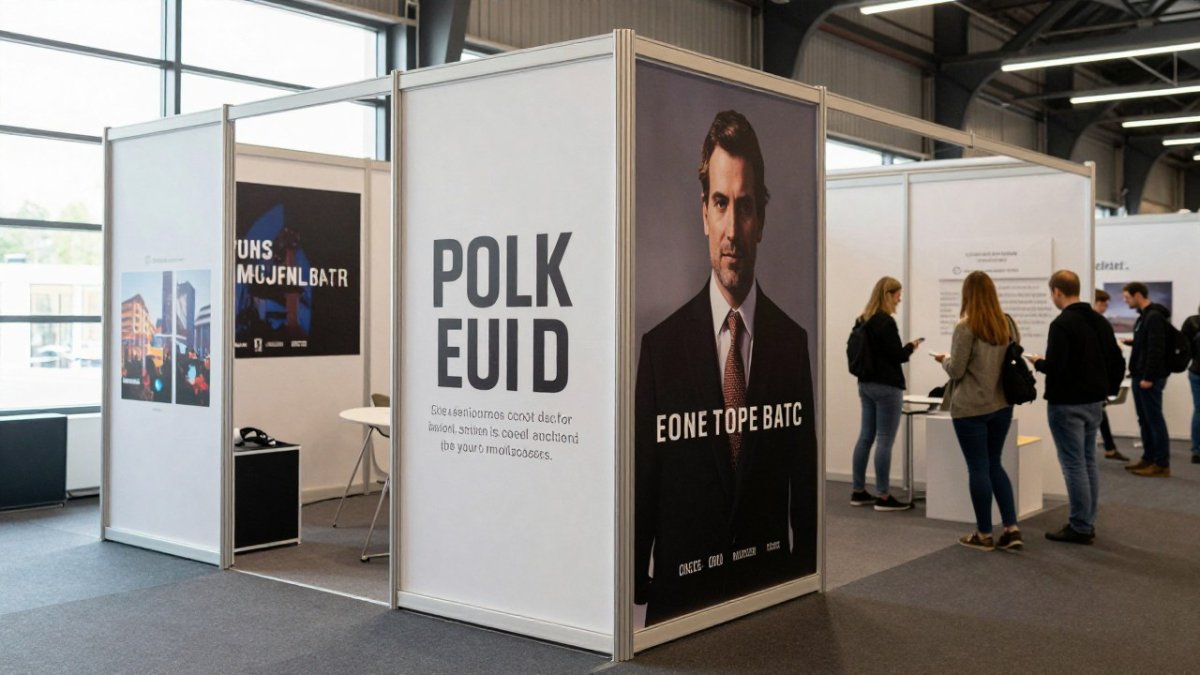
Work from the stand plan outwards. Identify the main viewing point, usually the aisle directly in front, and place your strongest message there. Keep logos and key phrases well inside the safe area so they are not lost at the edges where panels join or fixings sit.
Large Format Print Artwork Requirements and Prepress Checklist
Getting artwork right before you send it is the single biggest factor in avoiding print problems, reprints and missed show dates. Many issues at the proofing stage trace back to a handful of file setup mistakes. Use this checklist as a working document, not a tick-box exercise, and read the notes against each item because the numbers matter at exhibition scale.
- Final print size set to the exact dimensions, including bleed (typically 3-5mm on each edge for rigid panels and banners; fabric graphics sometimes need 10-15mm because of stretch and seam allowance)
- Images at 100-150 DPI at final print size (large format viewed from distance tolerates lower resolution than A4, but a 100 DPI image blown up to 3m wide from a small original will still look soft up close)
- Colour mode set to CMYK where your printer requests it, with a check of how bright blues and greens shift (vivid RGB oranges and greens often dull in CMYK, so ask for a hard-copy or soft proof of brand colours)
- Fonts converted to outlines or embedded
- Logos supplied as vector files (EPS, PDF or SVG)
- Key text kept at least 50mm from trim edges on rigid panels, and further on fabric where the graphic wraps around a frame
- Artwork checked on screen at 100% and against a printed proof where possible
Watch out: artwork approved on a phone screen or an uncalibrated laptop monitor can look very different in print, so always judge colour and contrast from a proof or a calibrated display.
We run free artwork checks, so if you are new to print-ready files, send your design before the deadline and we will help you check it.
The main file setup values to check before sending artwork are summarised below.
| Item | Value | Note |
|---|---|---|
| Bleed on rigid panels and banners | 3-5mm | Each edge |
| Bleed on fabric graphics | 10-15mm | Allows for stretch and seam |
| Image resolution at final size | 100-150 DPI | Judged at final print size |
| Key text distance from trim (rigid panels) | At least 50mm | Keeps text clear of edges |
| Logo file format | EPS, PDF or SVG | Supplied as vector |
| Artwork check | 100% on screen and proof | Calibrated display or printed proof |
Planning Your Print Timeline, Delivery and Installation
Exhibition deadlines are fixed, so work backwards from the show date. Allow time for artwork approval, production and delivery, and build in a buffer for revisions. Rush orders are possible, but they leave less room to catch errors, so planning early protects quality.
Confirm delivery to the venue or your own site and check who will receive the parcels. Large tubes and boxes can be damaged in transit, so ask for protective packaging and allow time to inspect items on arrival. If you need graphics installed on site, check whether the venue has restrictions on fixings or access times. Once the prints arrive safely, plan how their scale and placement will work in the space, since displaying large photography depends as much on the viewing distance as on the image itself.
For transport, pack roller banners in their cases and store fabric graphics flat or loosely rolled. Keep a spare copy of key artwork in your files in case a replacement is needed.
Sustainable Exhibition Printing: Materials, Reuse and Storage
Sustainable exhibition printing is less about a single eco label and more about matching material choice to how many times the graphic will be used and what happens to it afterwards. The most sustainable graphic is usually the one you reuse, so the first question is not which substrate is greenest but whether the piece will be stored and rehung or discarded after one show.
Substrates and their trade-offs. PVC banner material is durable and weather-resistant but difficult to recycle in most kerbside streams, so it suits repeated outdoor use where longevity outweighs end-of-life concerns. PVC-free banners, often based on polypropylene or polyester, are lighter and more readily recyclable but can be less tear-resistant and may not suit long outdoor exposure. Fabric graphics, stretch polyester for pop-up frames and backdrops, pack small, resist creasing and can be washed, which makes them a strong choice for reusable modular systems; check whether the fabric is a single-material polyester that can be recycled rather than a coated blend. Rigid boards vary widely: foamex and foam PVC are common but hard to recycle, while cardboard-honeycomb and some PET-based boards offer lower-impact alternatives for short-life signage. Recycled and recyclable papers suit posters and information panels where weather resistance is not needed.
Inks and print processes. Ask whether your printer uses UV-curable, latex or water-based inks, and whether the process is suitable for the substrate you have chosen. Low-solvent and water-based options reduce emissions, but the practical difference for an exhibitor is usually in durability and colour fastness rather than in the print itself. If a graphic will be handled heavily or stored between shows, a more durable ink and laminate combination may outlast a lower-impact alternative and be the better environmental choice over the life of the piece.
Modular systems and replacement graphics. Modular stands with replaceable fabric or panel graphics let you keep the frame and swap only the printed surface, which cuts waste and cost across a season of events. The trade-off is that modular frames can be heavier and bulkier to transport than a simple roller banner, so weigh reuse against logistics. Replacement graphics also let you refresh messaging without replacing hardware, and keeping the frame in service for several years is often the single biggest sustainability gain available to an exhibitor.
Storage and end-of-life. Storage matters as much as material. Keep graphics dry, flat or rolled without creases, and out of direct sunlight, because UV exposure and damp are the main causes of premature failure. Label cases clearly so the right artwork is used for each show, which avoids reprints. At end of life, ask your printer whether they take back frames, banners or fabric for recycling, and separate materials where possible, mixed-material banners with welded eyelets and reinforced hems are harder to recycle than single-material graphics.
Print Brain uses eco-friendly practices in its production, and we can talk you through the options that fit your sustainability goals.
Accessible Exhibition Graphics and Measuring Print Performance
Accessible graphics are easier for everyone to read. Use large, sans-serif type with strong contrast between text and background, and keep each panel to one clear message. Avoid placing key information over busy photographs, and check that important text is readable from the aisle and from a seated position where relevant.
Measuring performance helps you improve your next show. Track how many visitors stop at your stand, how many leads you collect, and which graphics people photograph or ask about. Simple counts from your team, compared across events, show which messages and formats are working.
Booking Your Exhibition Prints with Print Brain
Print Brain supplies large-format displays from our Dorset base, with delivery across the UK. Our friendly team offers personalised assistance and bespoke quotes, and we run free artwork checks so your files are print-ready before production starts.
Pricing depends on size, material, quantity and delivery date, so we recommend requesting a bespoke quote. Visit our website to browse the full range, or contact the team to talk through your exhibition plans and get a bespoke quote.
Frequently Asked Questions
What is large format printing for exhibitions?
Large format printing produces graphics too big for standard office or digital presses, typically A2 and above, and often several metres wide. For exhibitions it covers roller banners, stand graphics, backdrops, floor graphics and posters that must be read from a distance. Output is usually printed on wide-format machines using materials chosen for the venue, the handling involved and how long the graphics need to last. Pricing depends on size, material, quantity and delivery date, so request a quote from Print Brain for current costs.
What types of large format prints work best at exhibitions?
Large-format graphics can create a strong visual impact on larger stands and help guide visitors around the space. The best choice depends on the stand size, how much visitors need to read at arm's length, and whether the graphics will be reused at future events.
What file format and resolution do I need for exhibition printing?
Supply print-ready PDFs with fonts embedded and images at the final print size. Large format graphics are often viewed from a distance, so images can be lower resolution than a brochure, but they should still look sharp at the size printed. Vector artwork such as logos and text keeps edges crisp at any scale. Print Brain offers free artwork checks, so you can confirm your files are suitable before the order goes to production.
How far in advance should I order exhibition prints?
Order as early as your schedule allows, particularly when a tight turnaround is needed before an event. Allow time for artwork approval, proofing, production and delivery to the venue. Lead times vary with size, material and finishing, so confirm the timing with Print Brain when requesting a quote. Ordering early also leaves room to correct any artwork issues found during checks.
Which materials are suitable for exhibition banners and displays?
Indoor and outdoor use call for different materials, since outdoor graphics need weather resistance. Ask Print Brain which materials suit your exhibition and whether eco-friendly options are available.
How can I make exhibition graphics more sustainable?
Plan artwork so it can be reused across several shows, which reduces waste and the need for repeat printing. Ask about eco-friendly production practices. Print Brain combines eco-friendly practices with quality printing, so discuss your sustainability goals when requesting a quote.
How do I prepare artwork for large format printing?
Set the document to the exact final print size, include bleed where needed, and keep text and key elements inside the safe margin. Embed fonts, convert text to outlines where appropriate, and check colour mode settings before supplying files. Keep logos as vector artwork and confirm that images are high enough quality for the size printed. Submitting files for Print Brain's free artwork check helps catch problems early.